Water damage presents itself in multiple forms, from minor leaks to severe flooding, and assessing its extent is essential for proper repair and restoration. The first step in evaluating water damage involves identifying visible signs, such as wall discoloration, paint peeling, or warped floors. These signs indicate that moisture has penetrated building materials and may cause structural problems if left untreated.
Water damage is classified into three categories: Class 1 involves limited damage affecting a small area; Class 2 indicates moderate damage to materials such as drywall and insulation; and Class 3 represents severe damage requiring extensive restoration work. The length of time water remains present significantly affects the severity of damage. Prolonged water exposure can result in serious consequences, including structural weakening and mold growth.
Beyond visible damage, it is important to examine hidden areas where water may have accumulated, including spaces behind walls and beneath flooring. Moisture meters and thermal imaging equipment are useful tools for detecting these hidden moisture areas, enabling a more comprehensive damage assessment. Determining the full extent of water damage is necessary for creating an effective restoration plan that addresses both immediate problems and potential long-term effects.
Assessing the structural integrity of the walls
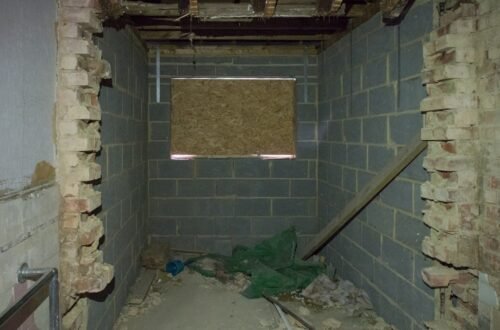
Once the extent of water damage has been established, the next critical step is assessing the structural integrity of the affected walls. This process involves a thorough inspection to determine whether the walls can support the building’s weight and maintain its overall stability. Water can weaken materials such as drywall, wood studs, and insulation, leading to potential collapse or other safety hazards.
Inspectors often look for signs of sagging or bowing in walls, which may indicate that the underlying structure has been compromised. In addition to visual inspections, it is essential to conduct physical tests on the materials themselves. For example, tapping on drywall can reveal hollow sounds that suggest water has damaged the material, while probing wood studs can help identify rot or decay.
If any structural components are found to be severely compromised, they may need to be replaced entirely to ensure the safety and longevity of the building. Furthermore, it is crucial to document all findings during this assessment process, as this information will be invaluable when planning repairs and communicating with insurance companies or contractors.
Identifying the source of the water damage
Identifying the source of water damage is a pivotal step in preventing future incidents and ensuring that repairs are effective. Water intrusion can occur from various sources, including roof leaks, plumbing failures, or even groundwater seepage. Each source presents unique challenges and requires tailored solutions.
For instance, a roof leak may necessitate repairs to shingles or flashing, while plumbing issues might involve replacing pipes or fixtures. Conducting a thorough investigation is essential to pinpointing the exact cause of the problem. In many cases, water damage may not be immediately apparent, especially if it originates from hidden sources such as behind walls or under floors.
Inspectors often utilize tools like moisture meters and infrared cameras to detect hidden leaks and moisture accumulation. Additionally, examining external factors such as drainage systems and landscaping can provide insights into how water may be entering the structure. For example, poor grading around a foundation can lead to water pooling near walls, increasing the risk of seepage.
By identifying and addressing the source of water damage, property owners can implement effective solutions that not only repair existing issues but also prevent future occurrences.
Removing damaged materials and drying out the area
Once the source of water damage has been identified and assessed, it is imperative to remove any damaged materials and thoroughly dry out the affected area. This step is crucial for preventing further deterioration and mitigating health risks associated with mold growth. The removal process typically begins with taking out any saturated materials such as drywall, insulation, and flooring.
It is essential to wear appropriate personal protective equipment (PPE) during this process to safeguard against potential contaminants. After removing damaged materials, drying out the area becomes a priority. This often involves using industrial-grade dehumidifiers and fans to circulate air and expedite evaporation.
The drying process should be monitored closely using moisture meters to ensure that all affected areas reach appropriate humidity levels before any repairs are made. Failure to adequately dry out the space can lead to lingering moisture issues and create an environment conducive to mold growth. In some cases, it may be necessary to employ specialized drying techniques such as thermal drying or desiccant dehumidification for particularly challenging situations.
Repairing and reinforcing the affected walls
| Step | Action | Materials Needed | Estimated Time | Key Tips |
|---|---|---|---|---|
| 1 | Assess Damage | Moisture meter, flashlight | 30 minutes | Check extent of water damage and mold presence |
| 2 | Dry the Wall | Fans, dehumidifier, towels | 24-48 hours | Ensure wall is completely dry before proceeding |
| 3 | Remove Damaged Material | Utility knife, scraper, gloves | 1-2 hours | Cut out soft or crumbling drywall carefully |
| 4 | Treat Mold and Mildew | Mold cleaner, bleach solution, protective mask | 1 hour | Apply treatment thoroughly and allow to dry |
| 5 | Patch the Wall | Joint compound, drywall patch, putty knife | 2-3 hours (plus drying time) | Apply in layers and sand smooth between coats |
| 6 | Prime and Paint | Primer, paint, brushes or rollers | 2-4 hours | Use mold-resistant primer and paint for durability |
| 7 | Final Inspection | Visual check, moisture meter | 30 minutes | Ensure no moisture remains and finish is smooth |
With damaged materials removed and the area dried out, attention turns to repairing and reinforcing the affected walls. This process begins with replacing any compromised structural components, such as studs or beams that may have been weakened by prolonged exposure to moisture. New materials should be selected based on their durability and resistance to future water damage; for example, using moisture-resistant drywall in areas prone to humidity can help mitigate risks.
Once structural repairs are complete, it is essential to reinforce walls against potential future water intrusion. This may involve applying waterproofing membranes or sealants to exterior surfaces or ensuring that proper drainage systems are in place around the foundation. Additionally, installing vapor barriers in basements or crawl spaces can help prevent moisture from seeping into walls from below.
By taking these proactive measures during the repair process, property owners can significantly reduce the likelihood of recurring water damage.
Addressing any mold or mildew issues
Mold and mildew are common consequences of water damage and pose significant health risks if left unaddressed. After removing damaged materials and drying out the area, it is crucial to conduct a thorough inspection for any signs of mold growth. Mold can develop within 24 to 48 hours after water exposure, making early detection essential for effective remediation.
Areas that are particularly susceptible include hidden spaces behind walls, under carpets, and within HVAC systems. If mold is detected, it is vital to take immediate action to contain and remove it safely. This often involves sealing off affected areas to prevent spores from spreading during cleanup.
Professional mold remediation services may be necessary for extensive infestations, as they possess specialized equipment and expertise in safely removing mold while minimizing health risks. Additionally, addressing any underlying moisture issues is critical; without eliminating the source of moisture that allowed mold to thrive in the first place, future outbreaks are likely.
Priming and painting the restored walls
After completing repairs and addressing any mold issues, priming and painting the restored walls is an important final step in the restoration process. Priming serves multiple purposes: it seals any remaining stains from previous water damage, provides a uniform surface for paint application, and enhances adhesion for better durability. Selecting a high-quality primer specifically designed for use in areas prone to moisture can further protect against future issues.
Once primed, applying paint not only restores aesthetics but also adds an additional layer of protection against moisture intrusion. Choosing paint with mold-resistant properties can help safeguard against future growth in humid environments. When painting, it is essential to follow proper techniques for application; this includes using brushes or rollers suited for the type of paint being used and ensuring adequate ventilation during the process.
The final result should be a visually appealing surface that also contributes to the overall resilience of the structure against potential water damage.
Taking preventive measures to avoid future water damage
Preventing future water damage requires a proactive approach that encompasses regular maintenance and strategic improvements to property infrastructure. One of the most effective preventive measures is ensuring that gutters and downspouts are clean and functioning properly; clogged gutters can lead to overflow and water pooling around foundations. Additionally, grading around the property should direct water away from structures rather than toward them.
Regular inspections of plumbing systems are also crucial; leaks from pipes or fixtures can go unnoticed until significant damage occurs. Homeowners should consider installing sump pumps in basements or crawl spaces prone to flooding as an added layer of protection against groundwater intrusion. Furthermore, investing in waterproofing solutions for basements and crawl spaces can significantly reduce vulnerability to moisture-related issues.
By implementing these preventive measures alongside regular maintenance routines, property owners can effectively safeguard their homes against future water damage incidents.
FAQs
What are the common causes of water damage in walls?
Water damage in walls is commonly caused by leaks from plumbing, roof leaks, flooding, condensation, or poor drainage around the foundation.
How can I tell if my wall is water damaged?
Signs of water damage include discoloration or staining, peeling or bubbling paint, soft or spongy drywall, mold or mildew growth, and a musty odor.
Is it necessary to replace the entire wall if it is water damaged?
Not always. Minor water damage can often be repaired by drying the area, treating mold, and patching or repainting. Full replacement is usually only needed if the structural integrity is compromised.
What steps should I take before repairing water-damaged walls?
First, identify and fix the source of the water intrusion. Then, thoroughly dry the affected area to prevent mold growth. Remove any damaged materials that cannot be salvaged.
Can I repair water-damaged drywall myself?
Yes, minor repairs such as patching small areas, sanding, and repainting can be done by homeowners. However, extensive damage or mold issues may require professional help.
How do I prevent mold growth after water damage?
Ensure the wall is completely dry before sealing or painting. Use mold-resistant primers and paints, and maintain good ventilation in the area.
What materials are best for repairing water-damaged walls?
Materials like mold-resistant drywall, joint compound, primer, and paint are commonly used. For severe damage, replacing insulation and using waterproof barriers may be necessary.
How long does it take to repair water-damaged walls?
Repair time varies depending on the extent of damage. Drying can take several days, while repairs and repainting may take a few hours to a couple of days.
When should I call a professional for water-damaged wall repair?
If the damage is extensive, involves structural components, or if there is significant mold growth, it is advisable to seek professional assessment and repair services.